YOUR ULTIMATE SPA EXPERIENCE
Within these luxurious private suites, you will find a community of local businesses owned by the most passionate specialists, under one roof!
Microblading
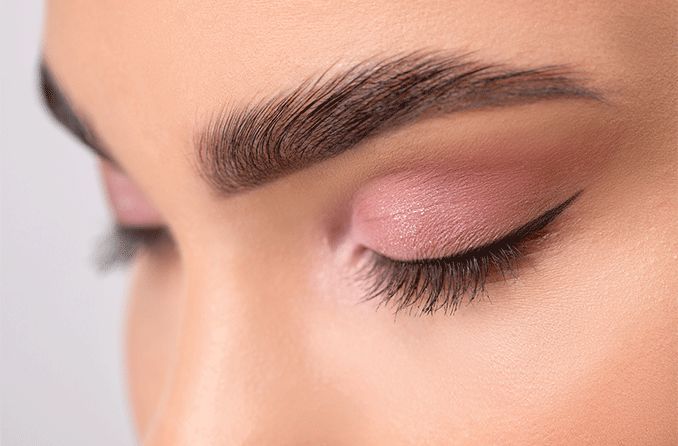
“Microblading is a semi permanent makeup that mimics actual growing hair on your eyebrows”
PhiShading is great for:
Clients who have alopecia
Clients that have very thin eyebrows or very little eyebrow hair
Clients who have inconsistent distribution of hair throughout their brows (such as a dense amount of hair at the head of the brow, but little hair at the tail of the brow)
Microblading $500
Perfecting and 6-12 week follow up Sessions are included
- Sessions are by appointment only.
- We recommended to book 3-4 weeks in advance as slots are filling up fast!
- Please allow 2-3 hours for your appointment.
Annual Touch up $350
Must be booked within 10-24 months.
Anything over 24 months from your last session is full price.
“It’s a very light tingling sensation. Nothing painful.”
Microblading is a relatively new, manual method. It is considered to be semi-permanent, as compared to the traditional hairstroke technique.
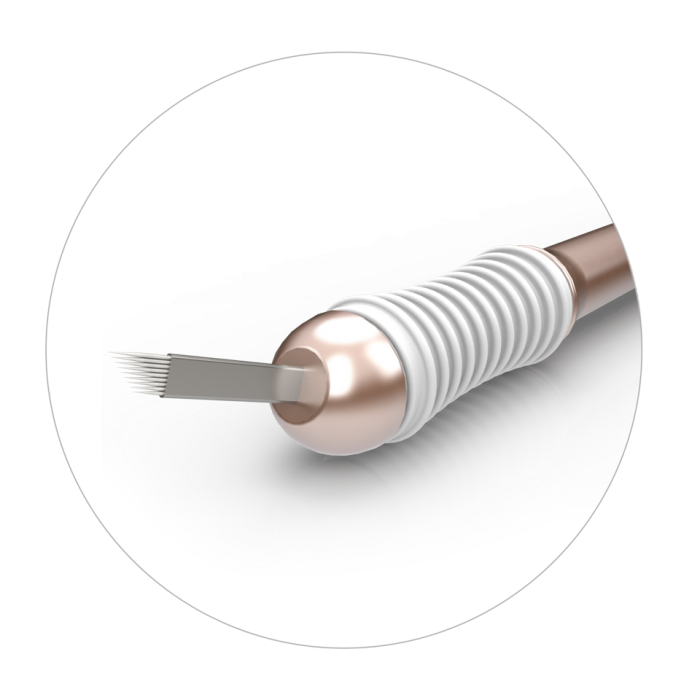
It is done using 14 very fine needles to deposit pigments into the epidermis.
Microblading is super natural and soft; It’s meant to be natural, not makeup ready. If you’re looking for a dramatic look or want to make your eyebrows pop you would have to use a powder.
Microblading is super easy to enhance since you already have a guide to follow on the days you’re looking for a dramatic look.
Origins of Microblading:
Eyebrow microblading goes by a few different names like, microstroking, micropigmentation, eyebrow embroidery, eyebrow feathering, and 3D eyebrows.
No matter the name, the procedure of microblading eyebrows is relatively new, but it has been popular in parts of Asia and Europe for roughly 25 years.
Microblading eyebrows continues to grow in popularity in the United States, and even though it looks like the party might have arrived a little late here, it’s actually a good thing as it has allowed the techniques to improve since its origin.
A microblade tool looks similar to an exacto knife, but instead of there being one big blade, there is a series of micro needles. The microblade is dipped into a selected color of pigment and then used to make a fine cut, microstroke, in the skin.
This process results in the pigment being implanted into the skin, which is known as micropigmentation. With the proper technique, the microbladed eyebrow results look beautiful and completely natural.
The best possible healed results require strict adherence to the microblading aftercare instructions, and understanding the microblading healing process.
Microblading vs Permanent Makeup
The procedure sounds a lot like a tattoo, because that’s exactly what it is. More specifically, microblading is a semi-permanent eyebrow tattoo.
The pigment used for microblading isn’t implanted into the skin as deeply compared to the depth used for permanent cosmetic procedures. The proper depth for the color to be implanted during the microblading procedure is the upper layer of the dermis. If the microstroke doesn’t go deep enough, the color retention will be poor, and if it’s too deep, it causes scarring and the healed strokes look blurry instead of fine and crisp.
The pigment being implanted to the correct depth, combined with its iron oxide base is what gives microblading results the appearance of natural looking eyebrows. The semi permanent qualities of the microblading pigment prevent it from fading into unnatural shades that are so common with permanent cosmetics.
There won’t be any love lost when saying, “See ya Later” to the daily eyebrow routine. Although microbladed eyebrows don’t require daily maintenance, you will still have to pluck or wax your eyebrows.
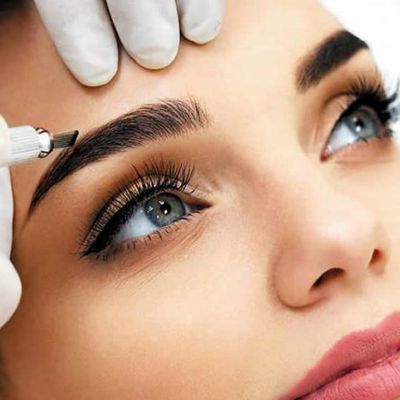
Imagine cutting back time getting ready in the morning by not having to color in your eyebrows daily! It will frame your face and give you a polish look daily with minimal effort! No more sweating off your eyebrows while at the gym, sauna, and swimming!
What to expect:
First, the perfect eyebrow shape for your face is mapped out, then we color match the pigment to your eyebrow hairs. The tool is made of 14 tiny needles is used to feather hair strokes into the skin.
The scratching sound from the blade may sound scary, but after a layer of numbing cream, clients say it doesn’t hurt.
Microblading is semi-permanent and lasts between one and three years.
It’s highly recommended clients do not have sun or tanning bed exposure for 30 days prior to microblading.
The skin does tend to scab after microblading, but that will heal. I recommend making an effort not to sweat the day of the procedure or for 10 days after.
Consuming alcohol or caffeine the night before or day of microblading isn’t recommended either.
Why Microblading?
- You’re fed up with pencilling your eyebrows in every day
- Maybe you dream of looking natural and put together even when you wake up, relax on holidays or exercise
- The final look is adapted to your hair colour, skin tone and the direction of your eyebrow hair growth
- Your face will look more youthful and brighter while you beam with confidence
How long will your Semi Permanent eyebrows last?
- The durability of the pigment depends mostly on your skin type and life style, exposure to sun, cosmetic procedures, etc.
- The results of microblading can last from 1 to 3 years
- A month after the procedure, you will come back for your Perfection Session (included in the price)
- A touch-up once a year is recommended to retain the saturation of pigment
The procedure:
- First we consult with our clients about their wishes and evaluate the condition of eyebrows
- Then we will draw and correct the shape of the eyebrow until you are fully satisfied with the results
- We will take photographs of the eyebrows and check their symmetry
- Then we carefully select the color of the pigment which will match your hair color and skin tone
- The procedure is almost painless and a numbing cream will be applied. The redness disappears within hours
- This procedure can take anything from 2 to 3 hours
Before Microblading procedure:
Here’s how to get your skin ready for the procedure:
- Do not pick/tweeze/wax/perform electrolysis one week before the procedure
- Do not tan two weeks prior to the service, or have a sunburned face
- Do not have any type of facial 2 weeks prior to the procedure
- Do not work out the day of the procedure
- Do not have botox 3 weeks prior to the procedure
- Do not take Fish Oil or Vitamin E one week prior to the procedure (they are natural blood thinners)
- Do not wax or tint your eyebrows 3 days prior to the procedure.
In order to avoid excessive bleeding and poor color deposit:
- Do not drink alcohol 24 – 48 hours before your tattoo
- Do not consume coffee before your procedure
- Do not take an Aspirin or Ibuprofen for pain relief (these also thin the blood)
Aftercare:
Here is the secret recipe for getting amazing microblading results!
It’s all in the aftercare!
Here’s a good acronym by Tina Davies to help you out, just think of: A – W – M which stands for Absolutely Wonderful Make-up or better yet: Absorb, Wash, and Moisturize!
The day of the treatment: Absorb
After the procedure, gently blot the area with clean tissue to absorb excess lymph fluid. Do this every 5 minutes for the full day until the oozing has stopped. Removing this fluid prevents hardening of the lymphatic fluids.
Days 1-7
Wash
Wash daily to remove bacteria, build up of product and oils, and dead skin. (Don’t worry, THIS DOES NOT REMOVE THE PIGMENT!)
Gently wash your eyebrows each morning and night with water and an antibacterial soap like Dial Soap, Cetaphil, or Neutrogena. With a very light touch, use your fingertips to gently cleanse the eyebrows. Rub the area in a smooth motion for 10 seconds and rinse with water ensuring that all soap is rinsed away. To dry, gently pat with a clean tissue. DO NOT use any cleansing products containing acids (glycolic, lactic, or AHA), or exfoliants.
Days 1-7
Moisturize
Apply a rice grain amount of aftercare ointment with a cotton swab and spread it across the treated area. Be sure not to over-apply, as this will suffocate your skin and delay healing. The ointment should be barely noticeable on the skin. NEVER put the ointment on a wet or damp tattoo.
AWM should have you covered, but here are some extra tips to help with a smooth and easy recovery.
Important Reminders
- Use a fresh pillowcase while you sleep.
- Let any scabbing or dry skin naturally exfoliate away. Picking can cause scarring or loss of color.
- No facials, botox, chemical treatments or microdermabrasion for 4 weeks.
- Avoid hot, sweaty exercise for one week.
- Avoid direct sun exposure or tanning for 4 weeks after the procedure. Wear a hat when outdoors.
- Avoid long, hot showers for the first 10 days.
- Avoid sleeping on your face for the first 10 days.
- Avoid face-down swimming, lakes, and hot tubs for the first 10 days,
- Avoid topical makeup and sunscreen on the area.
- DO NOT rub, pick, or scratch the treated area.
Remember, with the proper prep and aftercare routine, you will have much better results with your microblading procedure. Don’t forget your new favourite acronym: AWM -Absorb, Wash, Moisturize!
Important note about showering:
Limit your showers to 5 minutes so that you do not create too much steam. Keep your face/procedure area out of the water while you wash your body, then, at the end of your shower, wash your hair. Your face should only be getting wet only at the end of the shower. Avoid excessive rinsing and hot water on the treated area.
What to expect the next few days.
Day 1–2
The eyebrows are approximately 20 to 25% darker and bolder in width than they will be when healed.
Your skin is red under the pigment which causes the color of the pigment to appear darker.
There is some swelling, although difficult to actually see due to the thickness of the skin in the eyebrow area. This will subside.
Exfoliation, which begins in a few days, will cause the excess pigment surrounding the eyebrow procedure to flake away and a more narrow appearance will result.
New skin will heal over the pigmented area and result in a softer appearance of your eyebrows. Don’t be concerned that your eyebrows initially appear darker and heavier in size than you desire. This is all part of the process.
Day 3
Eyebrows start to itch and will appear a bit thicker in texture. Exfoliation begins.
Day 4
The skin begins to flake — peeling from the outside edges first.
Day 5
Color finishes flaking off and appears softer and grayer for a few days until color clarifies.
What not to do:
- Do not dye or tweeze eyebrows one week after procedure!
- Do not use any Retin-A or Glycolic Acids while healing!
- Do not use Peroxide or Neosporin, Vasaline on ANY areas!
- Do not scrub or pick treated areas!
- Do not expose area to sun or tanning beds!
- Avoid facials, the gym, swimming, and/or whirlpools/Saunas for at least five days!
The known possible complications from micropigmentation are:
- Redness, puffiness, dry patches, bruising or tenderness
- It is normal to lose approximately 1/3 of the color during the healing process.
- After initial procedure, the color may be a shade too dark; in six days it will appear too light. After ten days, the color will show more.
- It will appear softer when completely healed because the color will come from the dermal layer of the skin to the epidermal layer
Please be advised that once you book your appointment online, you will receive a phone call from us requesting your credit card information.
Providing this holds your appointment.
Cancellation Policy:
We have a very strict cancellation policy.
Any changes made outside the 24 hour window will not incur a charge.
Changes made within 24 hours of your scheduled time will be charged 50% of your service.
A No Call/No Show will be charged Full price
of your service.
Please keep in mind any outstanding payments must be paid before your next appointment is booked.

